Arduino結合DFPlayer Mini MP3模組快速實作,入門篇
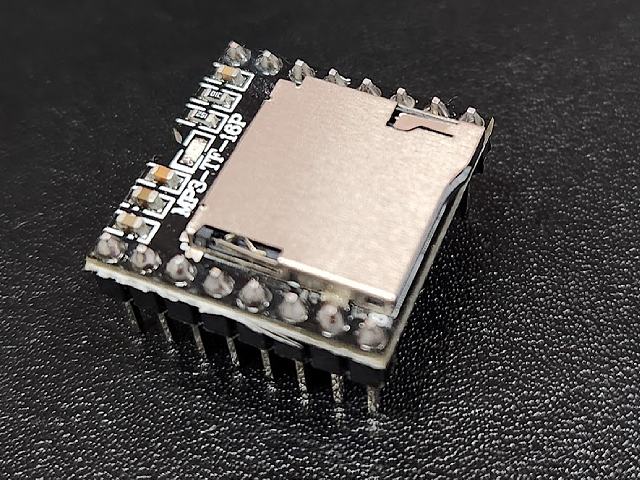
DFPlayer mini是最常見的MP3模組,配合函式庫後,用在Arduino或ESP32上並不困難。但很多人因為有幾點小細節沒有注意到,導致一直無法順利完成,蠻可惜的。沒關係,傑森用最快的速度把整個流程說明清楚,讓大家一次就上手!

DFPlayer mini是最常見的MP3模組,配合函式庫後,用在Arduino或ESP32上並不困難。但很多人因為有幾點小細節沒有注意到,導致一直無法順利完成,蠻可惜的。沒關係,傑森用最快的速度把整個流程說明清楚,讓大家一次就上手!
購買Arduino材料最佳選擇:https://www.jmaker.com.tw/
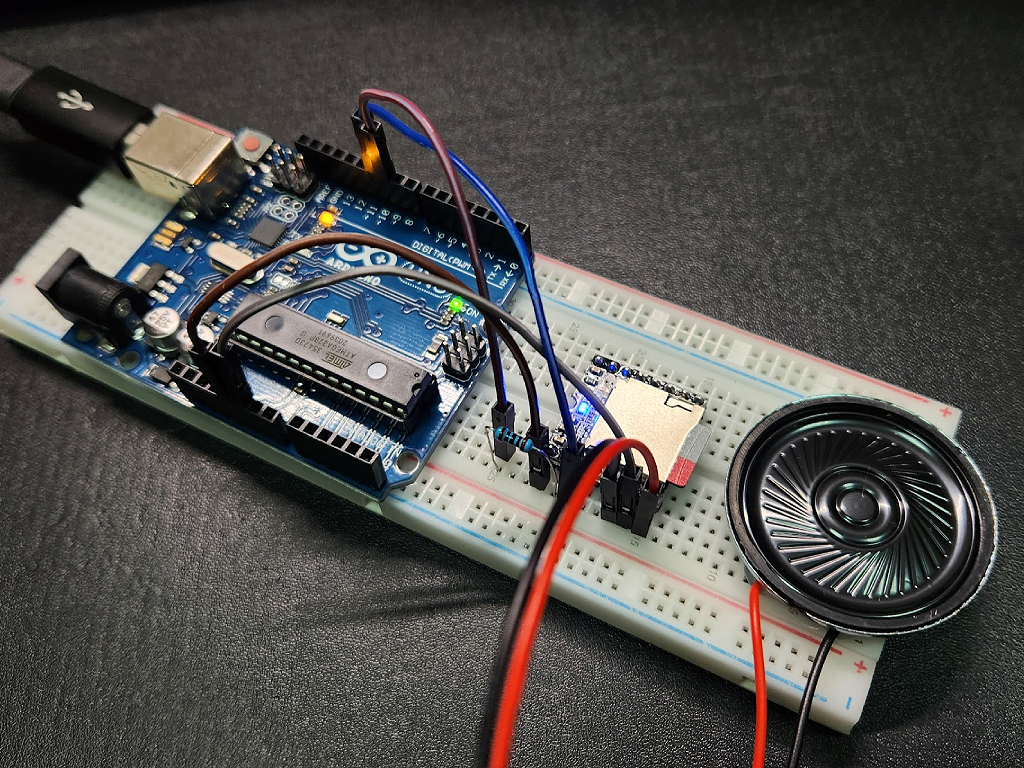
先準備一片Arduino Uno板、DFPlayer Mini模組、1K電阻,還有一個功率低一點的喇叭單體,最後再準備一片32G以下的SD卡,格式化為FAT32格式。
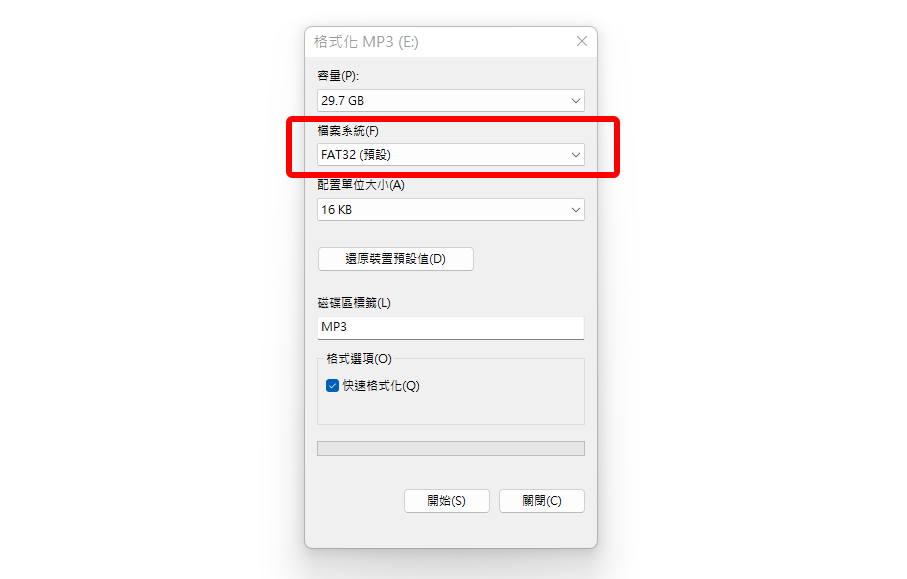
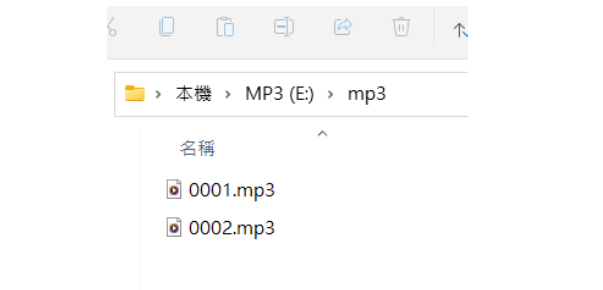
這裡有個重點,必須在根目錄裡建立一個「mp3」的目錄,把要用的MP3檔取名0開頭的4個數字,如:0001.mp3、0002.mp3,放進mp3目錄裡。
這裡傑森提供3個無版權的MP3檔案,大家可以拿來練習時使用。
https://reurl.cc/37AnZV
https://reurl.cc/97AkLX
https://reurl.cc/qrbR40
傑森創工獨家提供完整套件,歡迎選購!
https://www.jmaker.com.tw/products/dfplayer-mp3
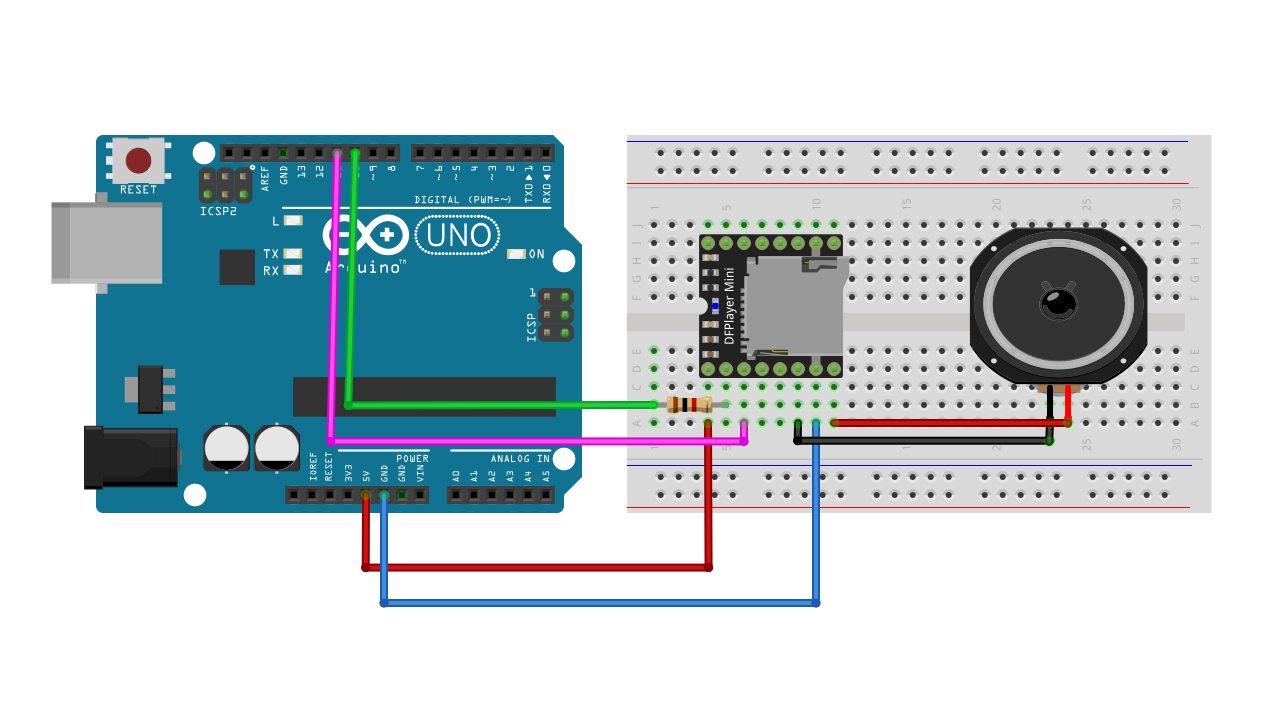
接著就可以開始接線囉!建議先把DFPlayer插在麵包板上,會比較方便插杜邦線。
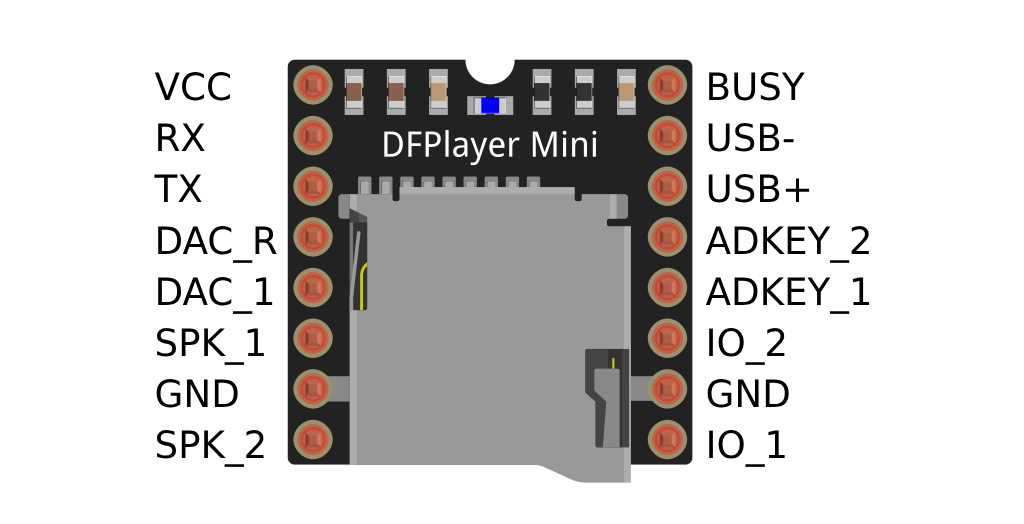
接線方式:
VCC => 5V
GND => GND
RX => Pin 10 (加1K電阻)
TX => Pin 11
SPK1,SPK2 => 分別接喇叭單體的兩條線,沒有序順限制
接著安裝DFPlayer的函式庫,在這裡傑森選的是DFPlayer Mini Mp3 by Makuna函式庫。
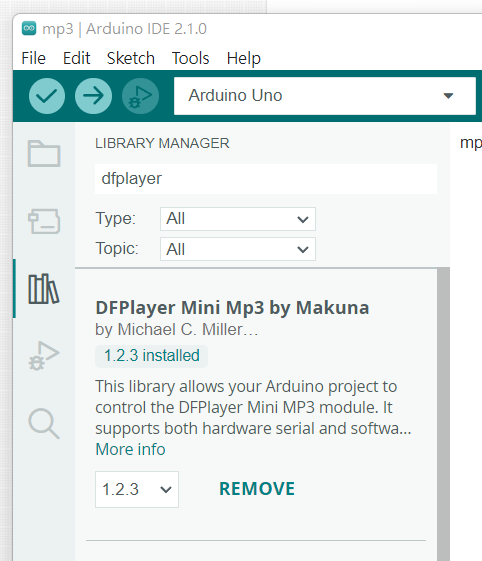
以下程式是傑森從該函式庫提供的範例進行簡化修改,主要的程式都有註解,大家一看就能懂。
主要功能很簡單,就是接上DFPlayer模組,設定音量為24,然後播SD卡裡的第一首MP3。
其中比較要注意的,就是如果用UNO板,要用到SoftwareSerial,這裡是用Pin 10和11;UNO板上的RX、TX和DFPlayer上的RX、TX是要反著接的。
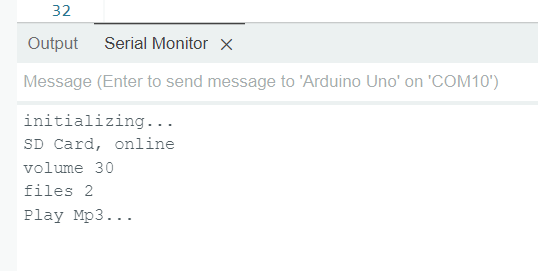
程式執行時可以在監控視窗中看到提示訊息。
其實這個範們並不難,只有幾個小細節要注意就能完成,大家試試吧!
下次傑森會再補上一些進階的功能,像是加個按鈕可以選下一首,加個旋鈕,可以控制音量等,大家期待吧^^
/*
 * 本範程式為Arduino結合DFPlayer MP3範例程式,由傑森創工提供
 *
 *
 * 請先安裝DFPlayer Mini Mp3 by Makuna函式庫,可由Arduino IDE裡的「程式管理員」進行安裝
 *
 * 粉絲團:https://www.facebook.com/jasonshow
 * 傑森創工購物網:https://www.jmaker.com.tw/
 * 傑森創工部落格:https://blog.jmaker.com.tw/
 */
// SD卡上的MP3檔案,必須放在mp3這個目錄,並取名0開頭的4個數字,如:0001.mp3、0002.mp3
// sd:/mp3/0001.mp3
// sd:/mp3/0002.mp3

#include <DFMiniMp3.h>
//使用軟體Serial
#include <SoftwareSerial.h>
SoftwareSerial mySerial(11, 10); // RX, TX

// 宣告 notify class
//
class Mp3Notify;

// 定義類型,其中第一個參數為決定用硬體Serial或軟體Serail
//
typedef DFMiniMp3<SoftwareSerial, Mp3Notify> DfMp3;  //如果用UNO板就用軟體Serail
//typedef DFMiniMp3<HardwareSerial, Mp3Notify> DfMp3;  //如果用Mega板就用硬體Serail

// 建立mp3物件
//
DfMp3 dfmp3(mySerial);

// 實作notification的類別,可以在不同的事件中,寫入想要進行的動作
// 若沒有特別要進行的處理,這裡不用修改
class Mp3Notify
{
public:
  static void PrintlnSourceAction(DfMp3_PlaySources source, const char* action)
  {
    if (source & DfMp3_PlaySources_Sd)
    {
        Serial.print("SD Card, ");
    }
    if (source & DfMp3_PlaySources_Usb)
    {
        Serial.print("USB Disk, ");
    }
    if (source & DfMp3_PlaySources_Flash)
    {
        Serial.print("Flash, ");
    }
    Serial.println(action);
  }
  static void OnError([[maybe_unused]] DfMp3& mp3, uint16_t errorCode)
  {
    // 錯誤訊息
    Serial.println();
    Serial.print("Com Error ");
    Serial.println(errorCode);
  }
  static void OnPlayFinished([[maybe_unused]] DfMp3& mp3, [[maybe_unused]] DfMp3_PlaySources source, uint16_t track)
  {
    Serial.print("Play finished for #");
    Serial.println(track);
  }
  static void OnPlaySourceOnline([[maybe_unused]] DfMp3& mp3, DfMp3_PlaySources source)
  {
    PrintlnSourceAction(source, "online");
  }
  static void OnPlaySourceInserted([[maybe_unused]] DfMp3& mp3, DfMp3_PlaySources source)
  {
    PrintlnSourceAction(source, "inserted");
  }
  static void OnPlaySourceRemoved([[maybe_unused]] DfMp3& mp3, DfMp3_PlaySources source)
  {
    PrintlnSourceAction(source, "removed");
  }
};

void setup()
{
  Serial.begin(9600); //啟用監控視窗
  Serial.println("initializing...");

  dfmp3.begin();  //開始使用DFPlayer模組

  //重置DFPlayer模組,會聽到"波"一聲
  dfmp3.reset();

  //音量控制,0~30
  uint16_t volume = dfmp3.getVolume();
  Serial.print("volume ");
  Serial.println(volume);
  dfmp3.setVolume(24);

  //取得所有MP3檔的總數
  uint16_t count = dfmp3.getTotalTrackCount(DfMp3_PlaySource_Sd);
  Serial.print("files ");
  Serial.println(count);

  Serial.println("Play Mp3...");

  // 播放MP3,參數就是第N首。如要播第一首MP3,參數就是1,第二首就是2
  dfmp3.playMp3FolderTrack(1);
}

void loop()
{

}