Arduino電子秤套件完整教學
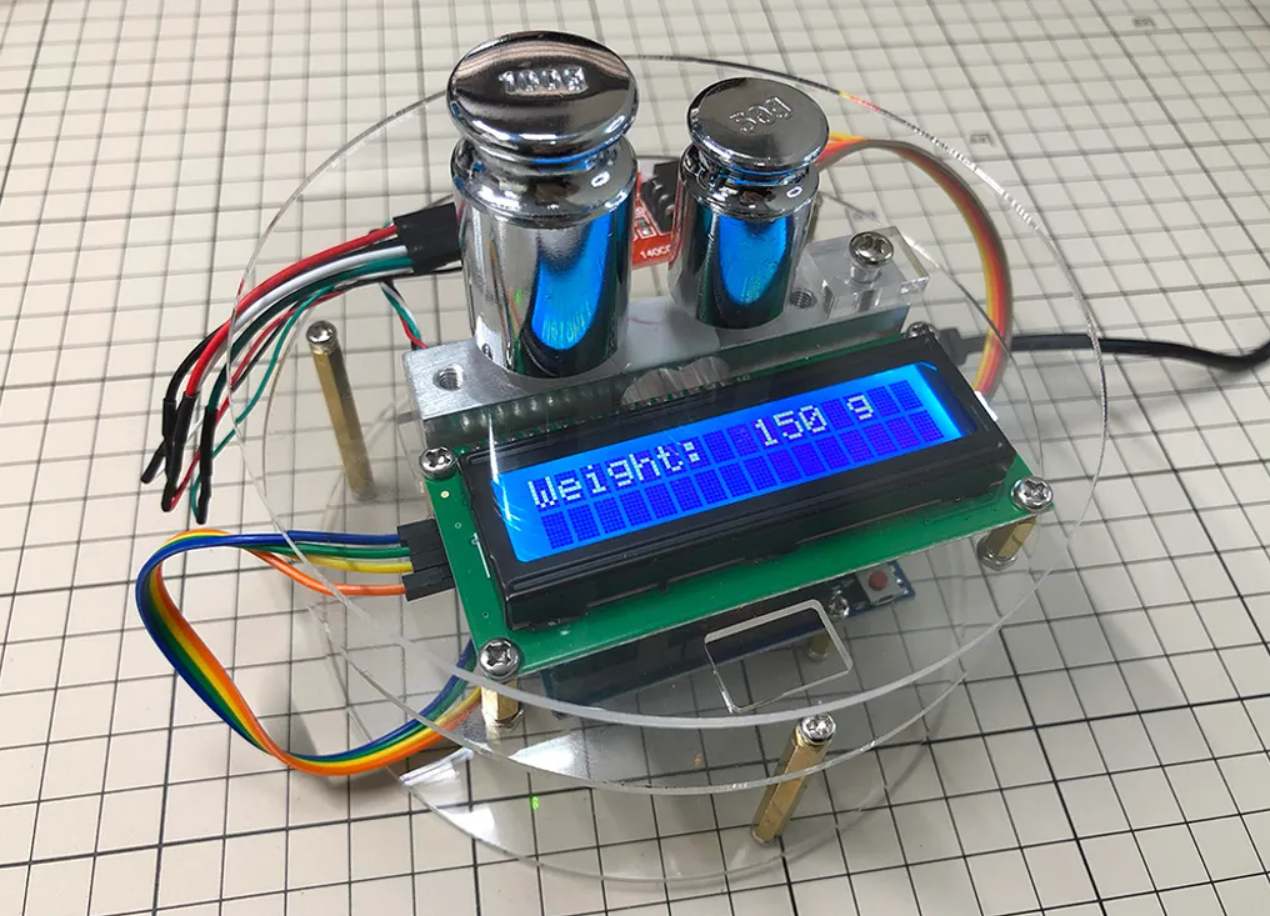
電子秤專題是許多人在學習Arduino會選擇挑戰的,主要的元件就是HX711重量感測模組,還有負重元(Load Cell)。但因為要把負重元安裝起來,所以必須加上至少2塊板子,一般會用雷切的壓克力板。而傑森創工提供的電子秤套件還包含了一個用來顯示的LCD,整套是用3片圓形壓克板組成。

電子秤專題是許多人在學習Arduino會選擇挑戰的,主要的元件就是HX711重量感測模組,還有負重元(Load Cell)。但因為要把負重元安裝起來,所以必須加上至少2塊板子,一般會用雷切的壓克力板。而傑森創工提供的電子秤套件還包含了一個用來顯示的LCD,整套是用3片圓形壓克板組成。
購買Arduino電子秤套件:
https://www.jmaker.com.tw/products/hx711-project
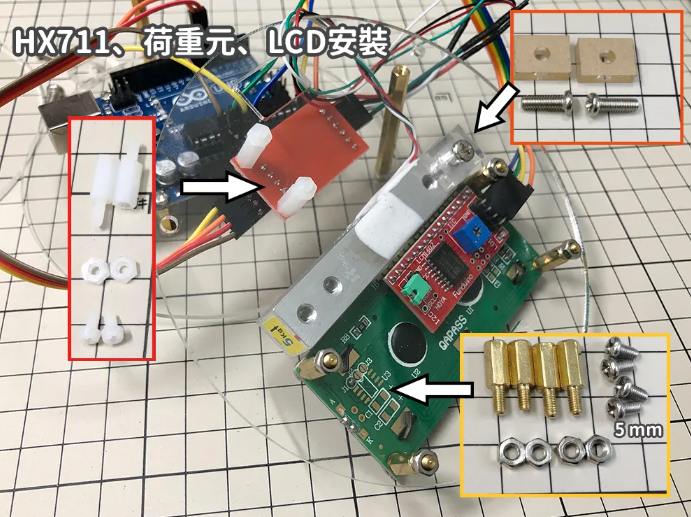
因為材料多了點,所以安裝可能要花點時間,傑森把關鍵的幾個部份用圖示讓大家了解。
請注意一點,因為如果元件全安裝好再接線,可能會變得不好接線,所以建議可以一邊安裝一邊接線。
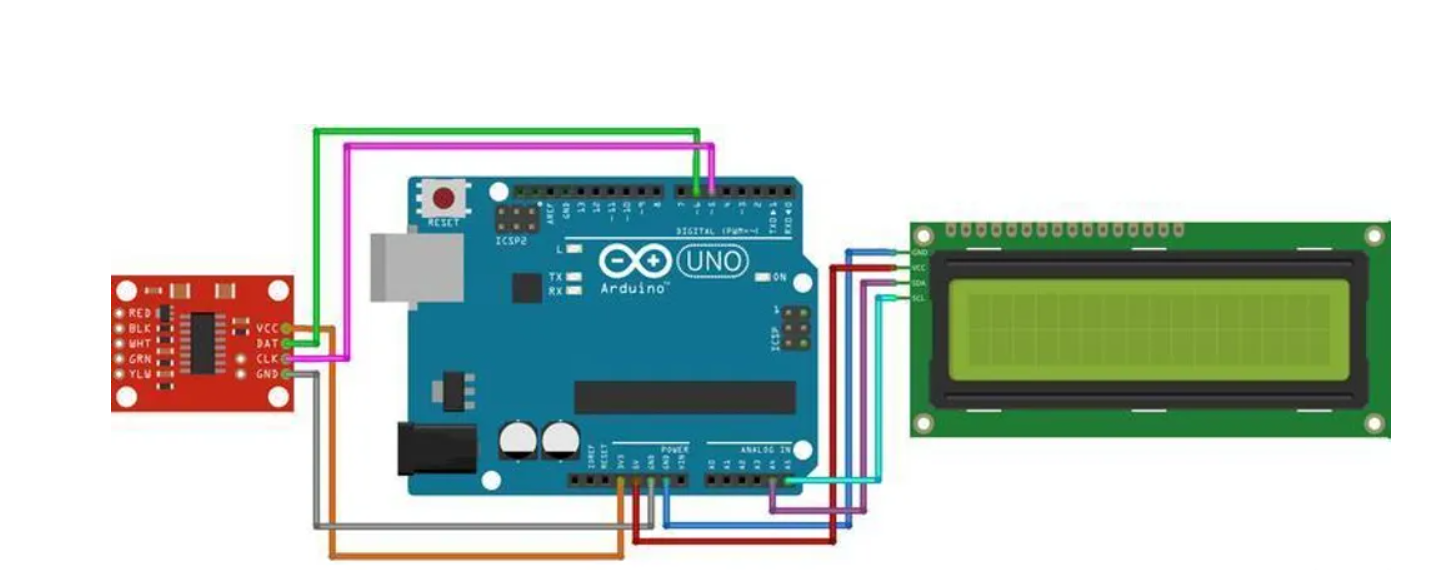
SCK >> PIN5
DT(DAT) >> PIN6
VCC >> 3.3V
GND >> GND
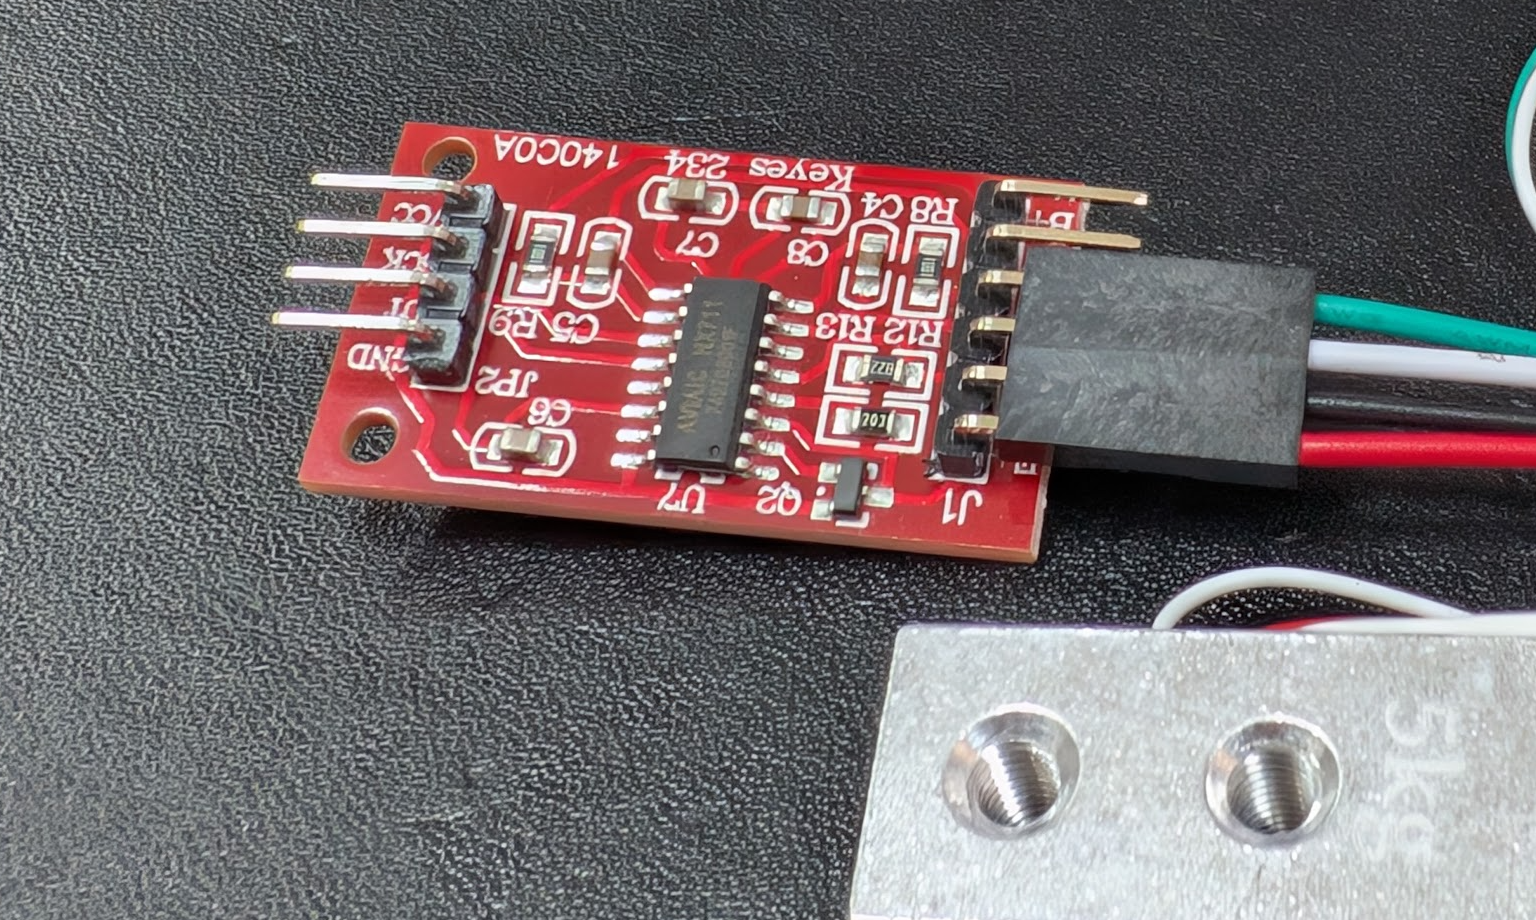
HX711和負重元之間有4條線,但非常好接,因為負重元端已用4PIN的杜邦線合併了,所以你只要把紅線接到J1這頭的E+,然後把4個PIN就插進去就行了。
至於LCD的部份就不在這裡多說明囉,若對1602 LCD不熟的朋友,請參考我們完整的教學哦!
SDA >> A4
SCL >> A5
VCC >> 5V
GND >> GND
Arduino 1602 LCD 最快速範例:
https://blog.jmaker.com.tw/lcd1602/
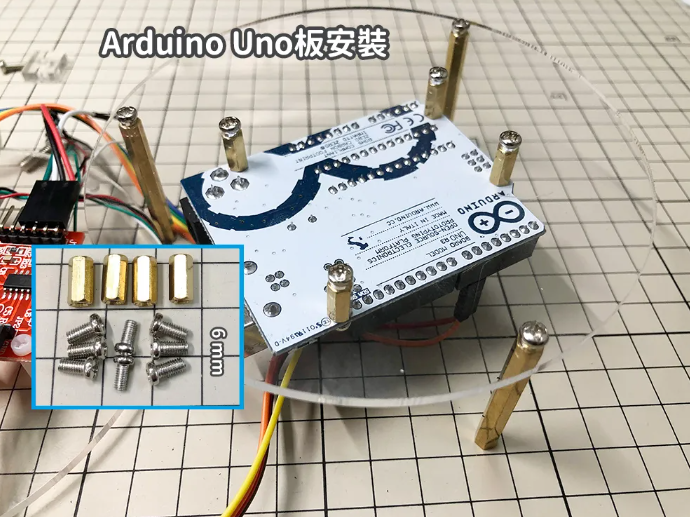
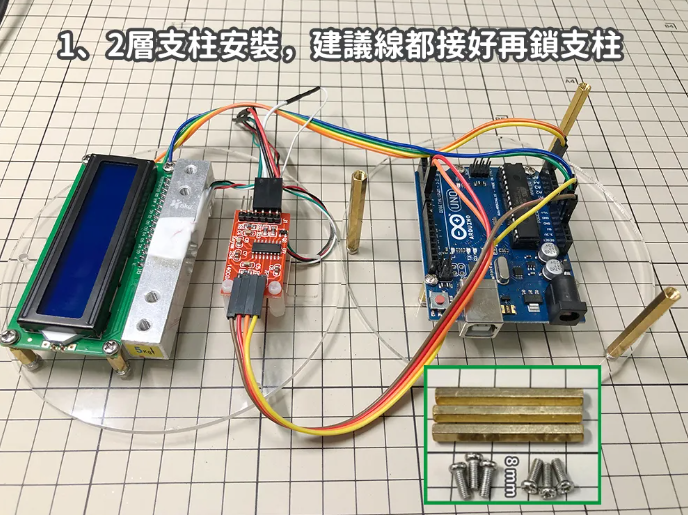
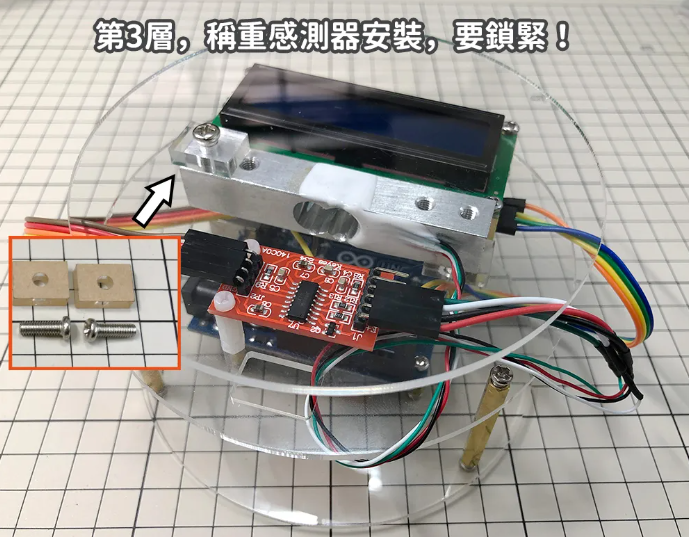
其它的部份就請照以下說明安裝囉!

請注意:新版本的套件,全部都升級成銅柱,就沒有尼龍柱囉。
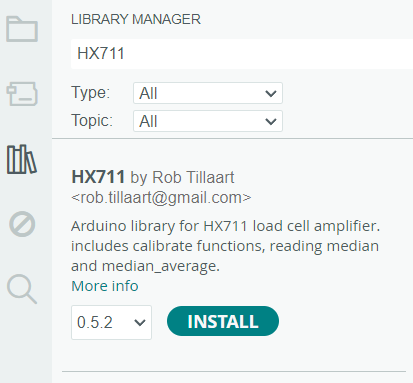
接著先安裝HX711的函式庫,這裡選擇的是"HX711 by Rob Tillaart".
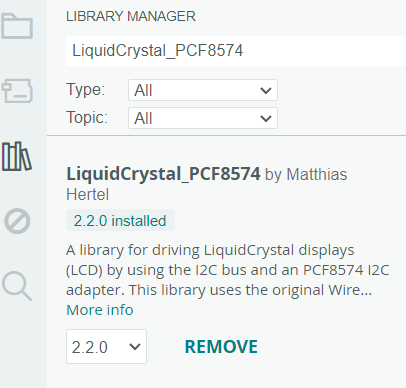
LCD的函式庫"LiquidCrystal_PCF8574"也要記得安裝。
程式的話要分兩部份,因為組裝的材料不同,所以整個經裝好後,必須進行校正程式,取得校正的參數,把它帶入正式應用的程式中,這樣測量出來的數值才會準確。
在校正時會用到套件中的砝碼,來當作基準重量,這次我們用的是100g的那個,所以在程式中這行要注意:sample_weight = 100
我們先寫好校正的程式吧!
/*
 * 本程式為Arduino電子秤套件的範例程式,由傑森創工提供
 * 購買套件:https://www.jmaker.com.tw/products/hx711-project
 *
 * 粉絲團:https://www.facebook.com/jasonshow
 * 傑森創工購物網:https://www.jmaker.com.tw/
 * 傑森創工部落格:https://blog.jmaker.com.tw/
 */


#include "HX711.h"

// HX711 接線設定
const int DT_PIN = 6;
const int SCK_PIN = 5;
const int sample_weight = 100;  //基準物品的真實重量(公克)

HX711 scale;

void setup() {
  Serial.begin(9600);
  scale.begin(DT_PIN, SCK_PIN);
  scale.set_scale();  // 開始取得比例參數
  scale.tare();
  Serial.println("Nothing on it.");
  Serial.println(scale.get_units(10));
  Serial.println("Please put sapmple object on it..."); //提示放上基準物品

}

void loop() {
  float current_weight=scale.get_units(10);  // 取得10次數值的平均
  float scale_factor=(current_weight/sample_weight);
  Serial.print("Scale number:  ");
  Serial.println(scale_factor,0);  // 顯示比例參數,記起來,以便用在正式的程式中

}
我們先把程式上傳到UNO板,這時先不要放砝碼哦,先打開Arduino IDE的監控視窗,等出現了"Please put sapmple object on it..."時,再把砝碼放上去。
這時會不斷出現"Scale number:",大致抓一個中間值即可,記錄起來,等一下要用它。這次例子傑森抓到的是326。你要記得自己取得的參數哦!

接著就寫另一支真正用來量測的程式囉,其實用了HX711的函式庫後,程式真的很簡單。
記得我們校正程式取得的參數326,在這裡要填上:scale_factor = 326。填上你所得到的數值哦,每個人的數值都會不同,不能直接拿傑森的這個參數哦!
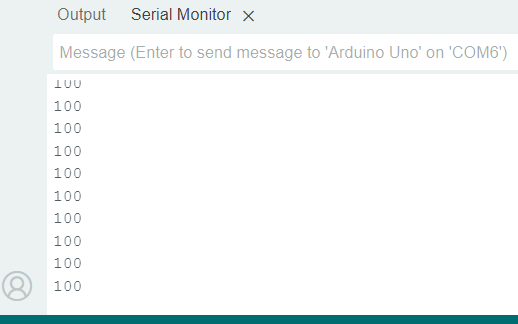
程式很簡單,每秒會取得目前測得的重量值,以克為單位,然後顯示在監控視窗中。你可以拿50g或100g的砝碼上去試看看,看有沒有準備。儘可能把物體放在正中央哦!
/*
 * 本程式為Arduino電子秤套件的範例程式,由傑森創工提供
 * 購買套件:https://www.jmaker.com.tw/products/hx711-project
 *
 * 粉絲團:https://www.facebook.com/jasonshow
 * 傑森創工購物網:https://www.jmaker.com.tw/
 * 傑森創工部落格:https://blog.jmaker.com.tw/
 */

#include "HX711.h"

// 接線設定
const int DT_PIN = 6;
const int SCK_PIN = 5;

const int scale_factor = 326; //比例參數,從校正程式中取得

HX711 scale;

void setup() {
  Serial.begin(9600);
  Serial.println("Initializing the scale");

  scale.begin(DT_PIN, SCK_PIN);

  Serial.println("Before setting up the scale:");

  Serial.println(scale.get_units(5), 0);	//未設定比例參數前的數值

  scale.set_scale(scale_factor);       // 設定比例參數
  scale.tare();				        // 歸零

  Serial.println("After setting up the scale:");

  Serial.println(scale.get_units(5), 0);  //設定比例參數後的數值

  Serial.println("Readings:");  //在這個訊息之前都不要放東西在電子稱上
}

void loop() {

  Serial.println(scale.get_units(10), 0);

  scale.power_down();			        // 進入睡眠模式
  delay(1000);
  scale.power_up();               // 結束睡眠模式
}
接著就是把LCD和整個電子秤結合起來囉,其實也就加上LCD的程式碼而已,其餘程式都是相同的。
/*
 * 本程式為Arduino電子秤套件的範例程式,由傑森創工提供
 * 購買套件:https://www.jmaker.com.tw/products/hx711-project
 *
 * 粉絲團:https://www.facebook.com/jasonshow
 * 傑森創工購物網:https://www.jmaker.com.tw/
 * 傑森創工部落格:https://blog.jmaker.com.tw/
 */

#include "HX711.h"
#include <LiquidCrystal_PCF8574.h>

LiquidCrystal_PCF8574 lcd(0x27);  // 設定i2c位址,一般情況就是0x27和0x3F兩種

// 接線
const int DT_PIN = 6;
const int SCK_PIN = 5;

const int scale_factor = 324; //比例參數,從校正程式中取得

HX711 scale;

void setup() {
  Serial.begin(9600);
  Serial.println("Initializing the scale");

  scale.begin(DT_PIN, SCK_PIN);
  lcd.begin(16, 2); // 初始化LCD
  lcd.setBacklight(255);
  lcd.clear();

  Serial.println("Before setting up the scale:");

  Serial.println(scale.get_units(5), 0);	//未設定比例參數前的數值

  scale.set_scale(scale_factor);       // 設定比例參數
  scale.tare();				        // 歸零

  Serial.println("After setting up the scale:");

  Serial.println(scale.get_units(5), 0);  //設定比例參數後的數值

  Serial.println("Readings:");  //在這個訊息之前都不要放東西在電子稱上
}

void loop() {

  Serial.println(scale.get_units(10), 0);
  lcd.clear();
  lcd.setCursor(0, 0);  //設定游標位置 (字,行)
  lcd.print("Weight: ");
  lcd.setCursor(9, 0);
  float weight = scale.get_units(10);
  //避免出現負數
  if(weight<=0){
    weight = 0;
  }
  lcd.print(weight,0);
  lcd.setCursor(13, 0);
  lcd.print("g");
  scale.power_down();			        // 進入睡眠模式
  delay(500);
  scale.power_up();               // 結束睡眠模式
}
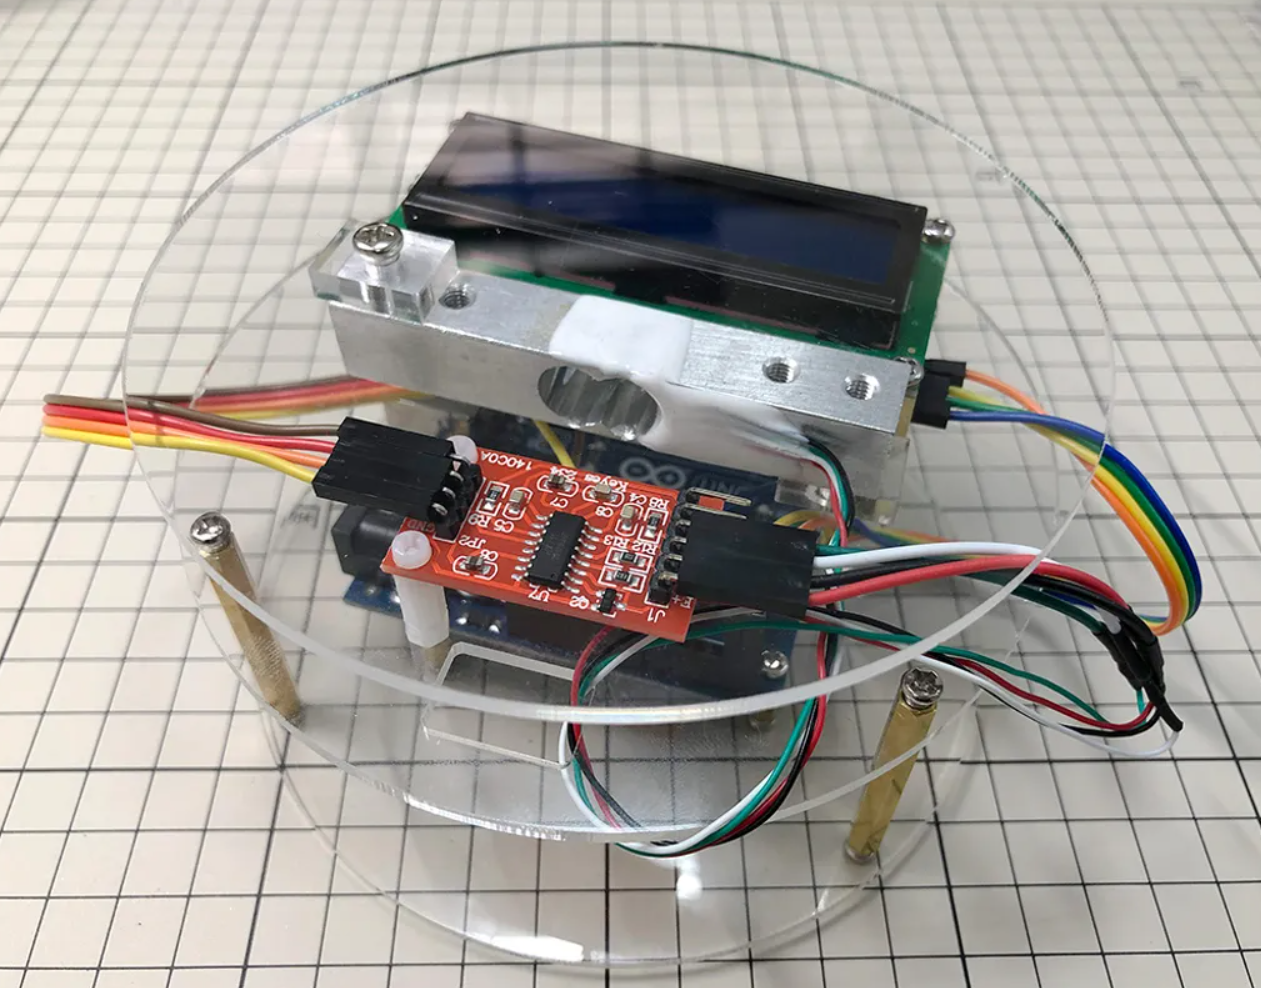
整個作品就完成了,效果不錯是吧!