迷你ESP32整合開發板:M5Stack Atom、Atom Lite
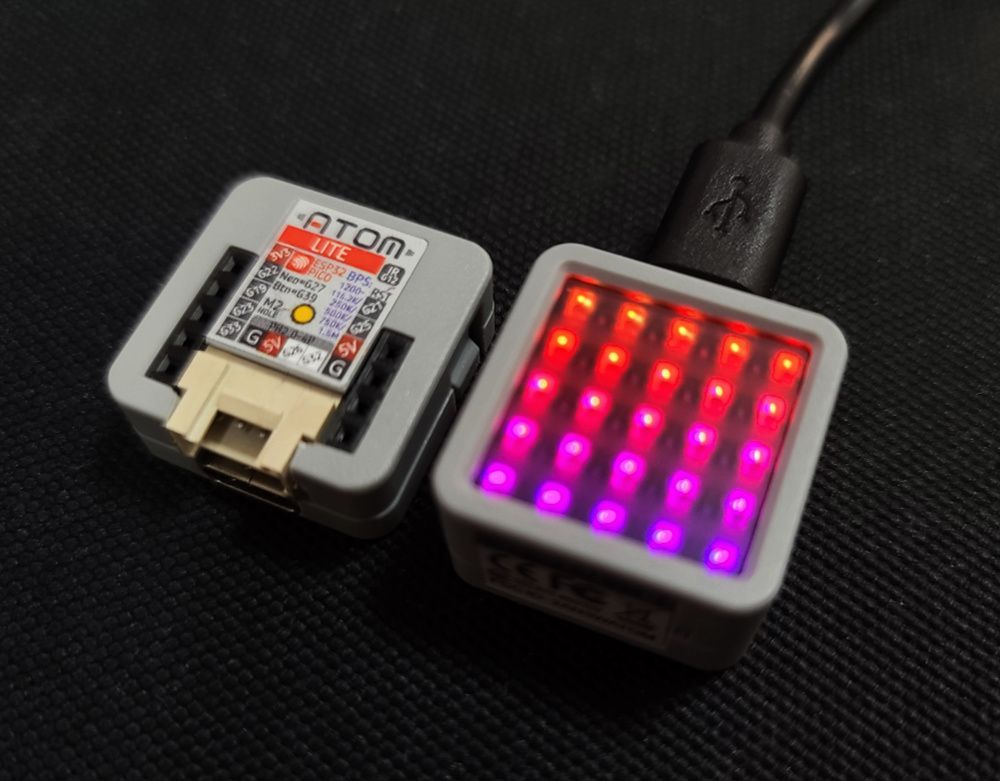
Atom是M5Stack系列開發板中最迷你的,大小只有24 * 24mm,一樣是用ESP32當核心,外型雖迷你,依然是很強大的。Matrix版本有5x5的LED,Lite版本則是換成單顆的RGB LED,Matrix版本還內建了MPU6886,雖然PIN腳少了一些,但很適合做一些極輕量的應用。

Atom是M5Stack系列開發板中最迷你的,大小只有24 * 24mm,一樣是用ESP32當核心,外型雖迷你,依然是很強大的。Matrix版本有5x5的LED,Lite版本則是換成單顆的RGB LED,Matrix版本還內建了MPU6886,雖然PIN腳少了一些,但很適合做一些極輕量的應用。
購買M5Stack Atom:
https://www.jmaker.com.tw/products/m5stack-atom
購買M5Stack Atom Lite:
https://www.jmaker.com.tw/products/atom-lite
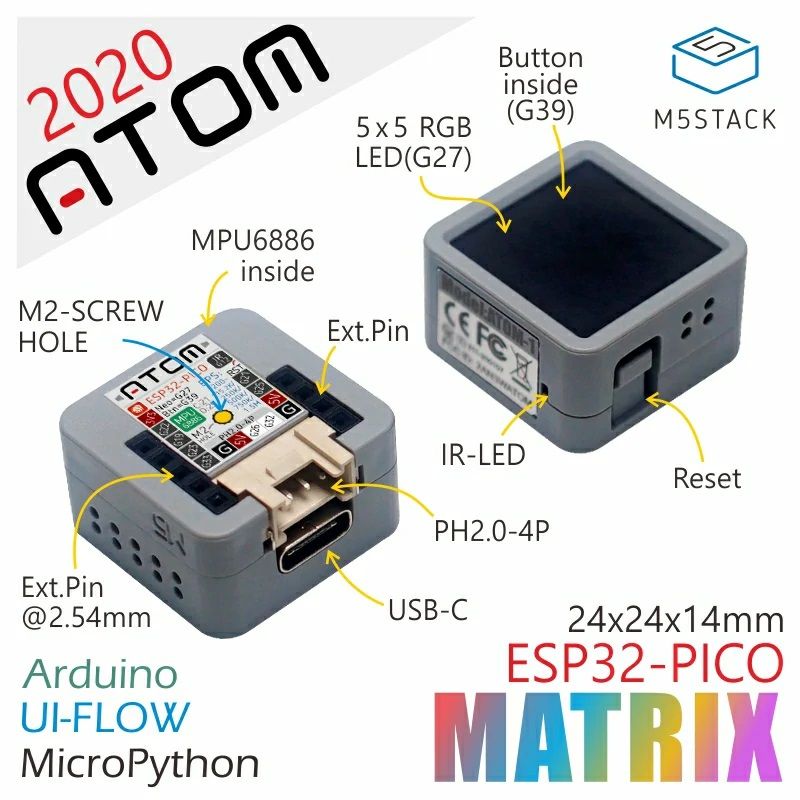
Atom Matrix官方規格說明:
- ESP32 PICO-based
- Programmable button
- 5 * 5 RGB LED matrix panel(WS2812C)
- Buitl-in Infra-red LED
- Built-in MPU6886 Inertial Sensor
- Extendable Pins & Holes
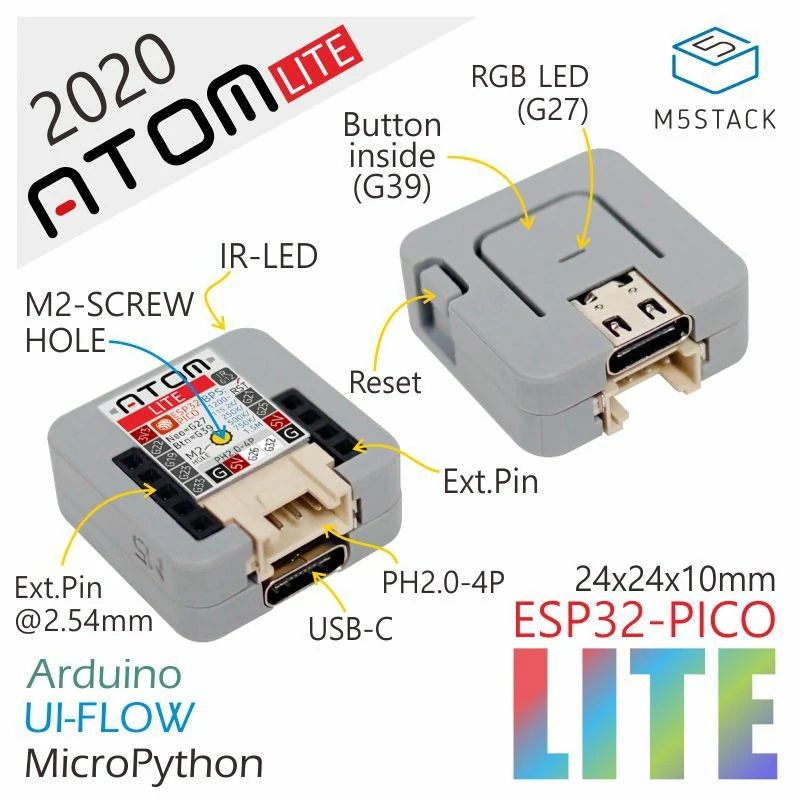
Atom Lite官方規格說明:
- ESP32-based
- RGB LED
- Programmable button
- Built-in Infra-red
- Extendable Pins & Holes
M5Stack Atom骨子裡是一塊ESP32的板子,所以要先幫Arduino IDE設定好ESP32的環境,可以參考傑森之前寫的教學:
如何在Arduino IDE中,新增ESP32系列開發板
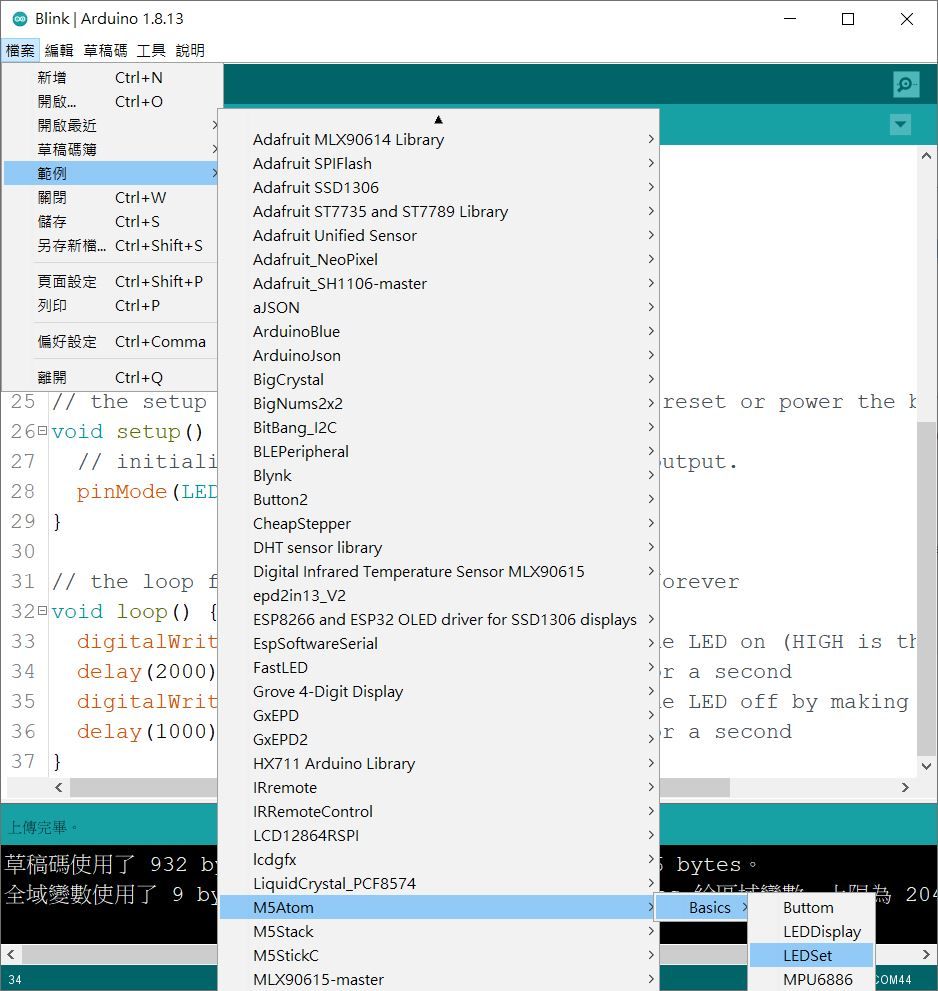
然後再安裝M5Atom的函式庫:
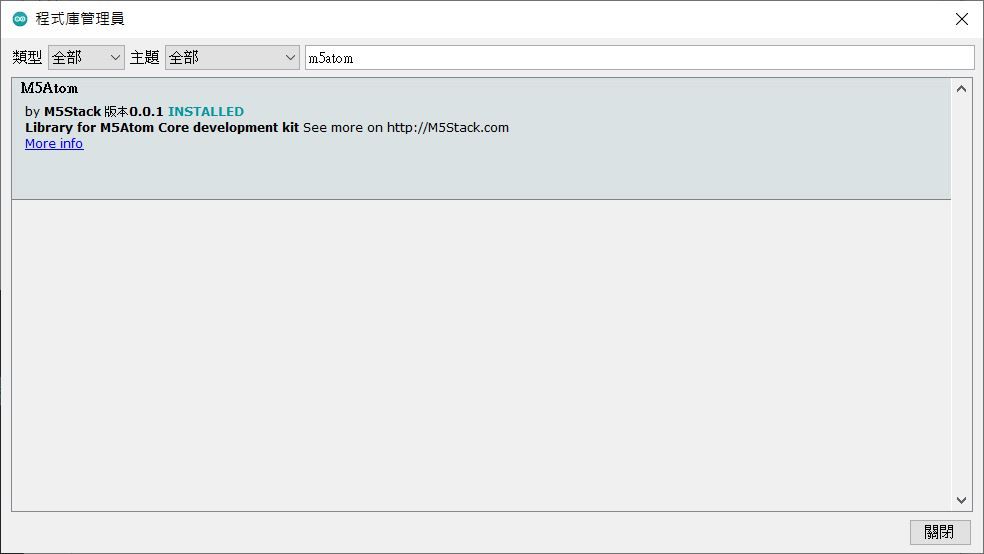
現在我們就能開始使用M5Stack Atom的開發板囉!
開發板記得要選M5Stick-C
我們先來測試Atom Lite,打開「LEDSet」這個最簡單的範例。
在Atom Lite上中間部份是一顆按鈕,正中央是一個RGB的LED燈,這個範例很簡單,就是按一下按鈕,便會改變LEG的顏色。
程式碼如下:
#include "M5Atom.h"  //載入函式庫

void setup()
{
    M5.begin(true, false, true);
    delay(50);
    M5.dis.drawpix(0, 0xf00000);  //一開始LED顯示為紅色
}

uint8_t FSM = 0;  //用來決定顏色的參數

void loop()
{
    if (M5.Btn.wasPressed())   //當按鈕被按下
    {

        switch (FSM)
        {
        case 0:
            M5.dis.drawpix(0, 0xf00000);  //紅色
            break;
        case 1:
            M5.dis.drawpix(0, 0x00f000);  //綠色
            break;
        case 2:
            M5.dis.drawpix(0, 0x0000f0);  //藍色
            break;
        case 3:
            M5.dis.drawpix(0, 0x707070);  //灰色
            break;
        default:
            break;
        }
        FSM++;  //參數加1
        if (FSM >= 4)
        {
            FSM = 0;
        }
    }

    delay(50);
    M5.update();
}
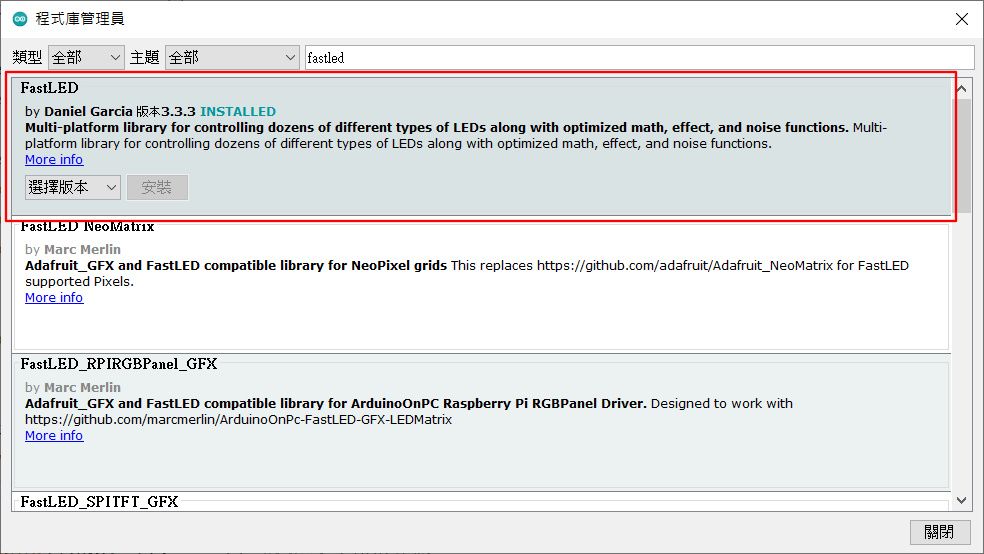
接下來我們測試Atom Matrix,主要是測一下它的5x5 LED陣列,所以先安裝FastLED函式庫,這個函式庫可以讓我們快速完成LED的動畫,蠻酷的!
我們這個例子只是單純測試LED的動畫,並沒有用到Atom其它功能,所以就算不載入Atom的函式庫也是OK的。
請打開FastLED的範例:「ColorPalette」,我們只要修改前面幾行和設定有關的程式,很簡單的。
#include <FastLED.h>

#define LED_PIN     27  //LED控制PIN
#define NUM_LEDS    25  //LED數量,5x5=25
#define BRIGHTNESS  20  //官方建議不要大於20,溫度過高會損壞LED上的壓克力
#define LED_TYPE    WS2812  //LED的類型
#define COLOR_ORDER GRB
CRGB leds[NUM_LEDS];

#define UPDATES_PER_SECOND 100

CRGBPalette16 currentPalette;
TBlendType    currentBlending;

extern CRGBPalette16 myRedWhiteBluePalette;
extern const TProgmemPalette16 myRedWhiteBluePalette_p PROGMEM;


void setup() {
    delay( 3000 ); // power-up safety delay
    FastLED.addLeds<LED_TYPE, LED_PIN, COLOR_ORDER>(leds, NUM_LEDS).setCorrection( TypicalLEDStrip );
    FastLED.setBrightness(  BRIGHTNESS );

    currentPalette = RainbowColors_p;
    currentBlending = LINEARBLEND;
}


void loop()
{
    ChangePalettePeriodically();

    static uint8_t startIndex = 0;
    startIndex = startIndex + 1; /* motion speed */

    FillLEDsFromPaletteColors( startIndex);

    FastLED.show();
    FastLED.delay(1000 / UPDATES_PER_SECOND);
}

void FillLEDsFromPaletteColors( uint8_t colorIndex)
{
    uint8_t brightness = 255;

    for( int i = 0; i < NUM_LEDS; i++) {
        leds[i] = ColorFromPalette( currentPalette, colorIndex, brightness, currentBlending);
        colorIndex += 3;
    }
}


void ChangePalettePeriodically()
{
    uint8_t secondHand = (millis() / 1000) % 60;
    static uint8_t lastSecond = 99;

    if( lastSecond != secondHand) {
        lastSecond = secondHand;
        if( secondHand ==  0)  { currentPalette = RainbowColors_p;         currentBlending = LINEARBLEND; }
        if( secondHand == 10)  { currentPalette = RainbowStripeColors_p;   currentBlending = NOBLEND;  }
        if( secondHand == 15)  { currentPalette = RainbowStripeColors_p;   currentBlending = LINEARBLEND; }
        if( secondHand == 20)  { SetupPurpleAndGreenPalette();             currentBlending = LINEARBLEND; }
        if( secondHand == 25)  { SetupTotallyRandomPalette();              currentBlending = LINEARBLEND; }
        if( secondHand == 30)  { SetupBlackAndWhiteStripedPalette();       currentBlending = NOBLEND; }
        if( secondHand == 35)  { SetupBlackAndWhiteStripedPalette();       currentBlending = LINEARBLEND; }
        if( secondHand == 40)  { currentPalette = CloudColors_p;           currentBlending = LINEARBLEND; }
        if( secondHand == 45)  { currentPalette = PartyColors_p;           currentBlending = LINEARBLEND; }
        if( secondHand == 50)  { currentPalette = myRedWhiteBluePalette_p; currentBlending = NOBLEND;  }
        if( secondHand == 55)  { currentPalette = myRedWhiteBluePalette_p; currentBlending = LINEARBLEND; }
    }
}

// This function fills the palette with totally random colors.
void SetupTotallyRandomPalette()
{
    for( int i = 0; i < 16; i++) {
        currentPalette[i] = CHSV( random8(), 255, random8());
    }
}

// This function sets up a palette of black and white stripes,
// using code.  Since the palette is effectively an array of
// sixteen CRGB colors, the various fill_* functions can be used
// to set them up.
void SetupBlackAndWhiteStripedPalette()
{
    // 'black out' all 16 palette entries...
    fill_solid( currentPalette, 16, CRGB::Black);
    // and set every fourth one to white.
    currentPalette[0] = CRGB::White;
    currentPalette[4] = CRGB::White;
    currentPalette[8] = CRGB::White;
    currentPalette[12] = CRGB::White;

}

// This function sets up a palette of purple and green stripes.
void SetupPurpleAndGreenPalette()
{
    CRGB purple = CHSV( HUE_PURPLE, 255, 255);
    CRGB green  = CHSV( HUE_GREEN, 255, 255);
    CRGB black  = CRGB::Black;

    currentPalette = CRGBPalette16(
                                   green,  green,  black,  black,
                                   purple, purple, black,  black,
                                   green,  green,  black,  black,
                                   purple, purple, black,  black );
}


// This example shows how to set up a static color palette
// which is stored in PROGMEM (flash), which is almost always more
// plentiful than RAM.  A static PROGMEM palette like this
// takes up 64 bytes of flash.
const TProgmemPalette16 myRedWhiteBluePalette_p PROGMEM =
{
    CRGB::Red,
    CRGB::Gray, // 'white' is too bright compared to red and blue
    CRGB::Blue,
    CRGB::Black,

    CRGB::Red,
    CRGB::Gray,
    CRGB::Blue,
    CRGB::Black,

    CRGB::Red,
    CRGB::Red,
    CRGB::Gray,
    CRGB::Gray,
    CRGB::Blue,
    CRGB::Blue,
    CRGB::Black,
    CRGB::Black
};
寫入程式後就可以看到漂亮的LED動畫囉,大家試試吧!
簡單測了下Atom Matrix搭配FastLED函式庫,蠻酷的!請期待測試報告哦! 傑森創工購物網:https://www.jmaker.com.tw/ 傑森創工部落格:https://blog.jmaker.com.tw/
Posted by 傑森創工 - 創客新聞網 Arduino & Raspberry Pi on Wednesday, May 6, 2020